MIDI Config
In the MIDI Config section you have two possibilities:

If MPE is not enabled, you can assign a channel number corresponding to the channel number of your MIDI track in your DAW or hardware.
With MPE enabled, you can choose a master channel between 1 and 16, that will define from where your channel placement will start. You can also choose the amount of channels that you want to use within the project. This will help use two MPE systems or elements at once, one at the start and one and the end of the MIDI channel spectrum (1-16).
For example, if you choose 1 as the master channel with an amount of 5 channels, the channels used for this element on your DAW (or hardware) will be from 1 to 6. However, if you choose channel 16 as the master channel with an amount of 5 channels, the channels mapped from your element to your DAW (or hardware) will be from 11 to 16.
The channel number has to correspond to how many fingers you want to use at the same time on the element. The master channel does not count as a finger (or stick).
Line Offset
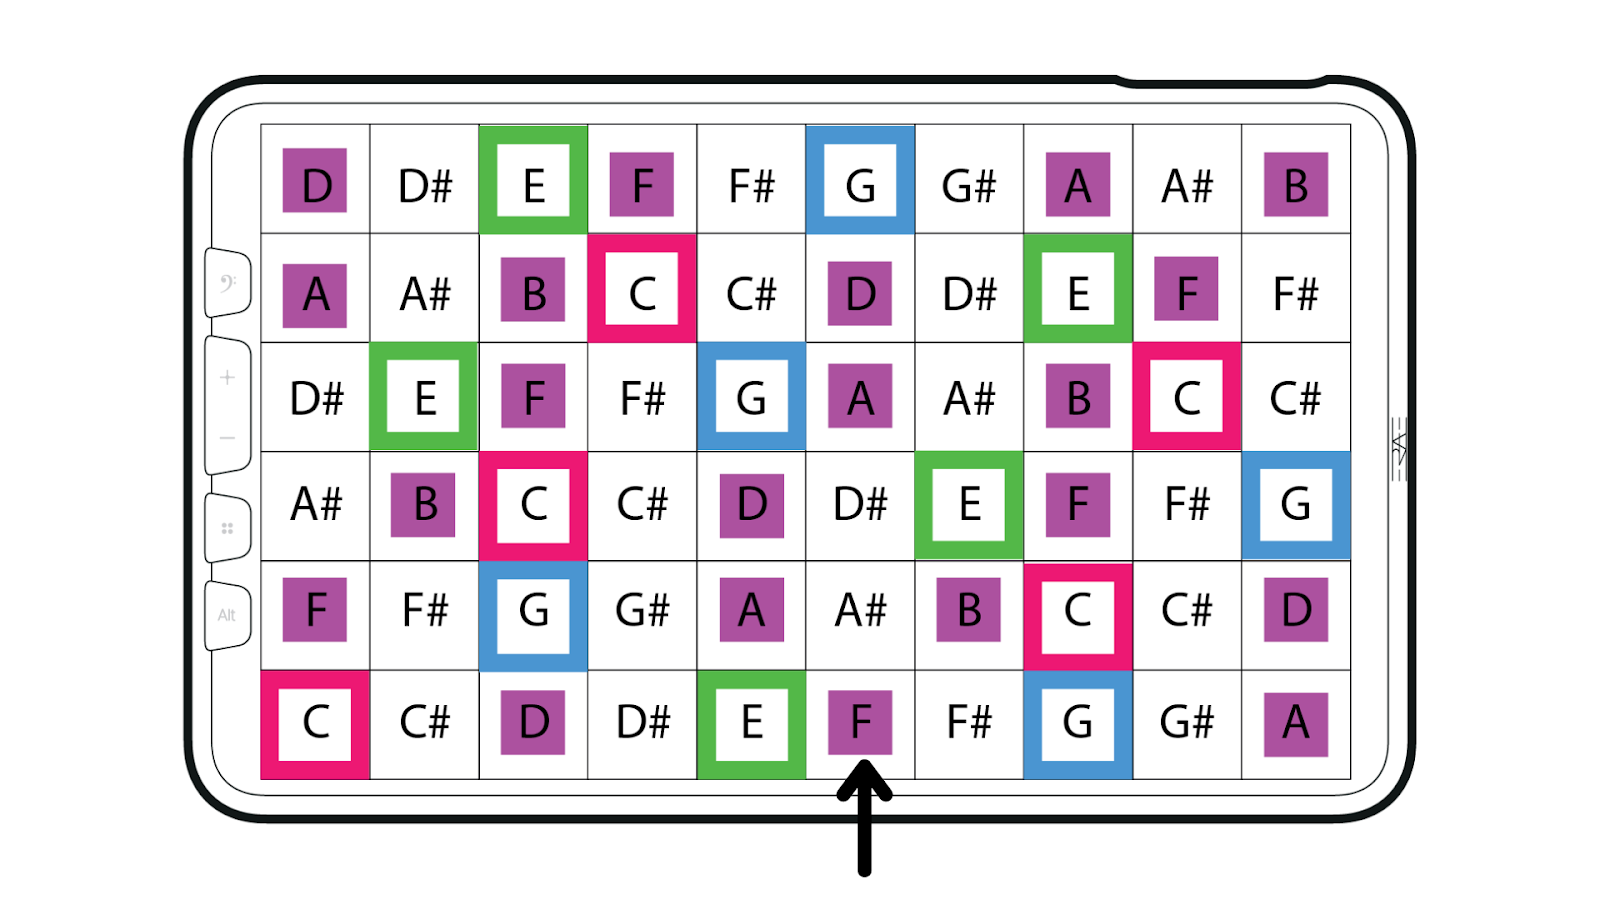
Line offset is the shifted displacement of all notes between the rows in an isomorphic key grid. You can change the line offset of your keygrid on the ERAE Lab in degrees or semi-tones. The benefit of having full control over your line offset allows you to shape your chords the way you want, on the grid.


A line offset can be used in two different ways. When you have chromatic mode enabled the Line Offset depends on semi-tones. By default, it is of 5 semi-tones.

In non-chromatic mode it depends on degrees not semi-tones, having by default 3 degrees.
Scale
You can choose your scale Type and Key as well as Octave in the ERAE Lab.

In order to select a scale on the ERAE Touch to play as MIDI, you can hold the bass clef symbol on the top left of the device, and view the Scale Selection interface. You can choose any scale that you want and play it accordingly.
Expressivity
In the Expressivity Tab you are also capable of controlling your Glissando, Pressure and Vibrato of your performance style.
Under Glissando, you are able to choose whether you would need a vertical implementation of your finger movement, as well as the amount of semitones in pitchbend that you would like to use. The smoothing section is made for how fast or slow the transition between the note slope is.

Under Pressure, you are able to choose the threshold of your finger sensitivity and the range value between 0-127.

Under Vibrato, you are able to choose the strength of your vibrato accent and the return speed of your quantisation to the returning note.

Control Change
Under Control Change, you are capable of configuring Pressure, X & Y axes. This allows your to map your movement while playing notes on the ERAE Touch.
We have created an entire video about CC mapping in our Walkthrough series on Youtube that explains carefully the difference between the axes, and ways to map your CC accordingly.
When you use relative X&Y axes, the initial value will be the constant that you choose (63) at the initial touch of your element on your ERAE, and will increase and decrease depending on your movement.
When you use absolute X&Y axes, the initial value will be variable across the entire layout. So wherever you touch it will be a different value (0-127).

You can choose your CC number and your value range, and that allows you to map many effects on the same element. We explain this more in our Walkthrough video.